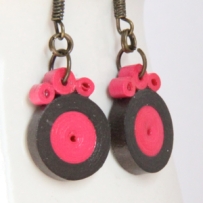
Make your own cute paper quilled circle earrings!
This earring design can be customized in any size or color combo to match any outfit! Here are the instructions:
Supplies (for a pair of earrings):
2 strips of pink paper 3” long
2 strips of pink paper 12” long
2 strips of brown paper 24” long
slotted quilling tool (here in my shop or here in the US)
glue (here in my shop and here in the US)
needle tool (optional) (here in my shop and here in the US)
The instructions will show and describe how to make two earrings. If you want to make just a pendant, make only one circle. If you want to make a pendant and earrings set, make three circles.
- Glue each 12” strip to each 24” strip to make one long strip.

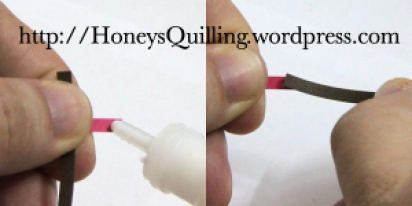
- To make a solid roll, roll each strip on the slotted quilling tool (you can also use a needle tool if you prefer). Do not let the roll expand at all. Carefully slide it off of the tool. I find it easiest to hold my thumbnail at the base of the roll right next to the tool, as shown in the left hand photo below and then slide it off. This ensures that the roll doesn’t come undone while taking it off of the tool. Once the roll is off of the tool, put a small bit of glue at the end and glue it shut. Hold it for a few seconds to allow it to dry so it does not expand once you set it down.

- If you have used a slotted tool to make your rolls, you will notice that the inside of each roll has a small line across it, (see left photo below). This is the part of the paper that was inside the slot of the slotted tool. If you prefer to have a round hole in the middle of your roll instead of the line, you have two choices. Your first choice is to use a needle tool to roll your pieces instead of the slotted tool. Your second choice is shown in the photos below. After your solid roll is glued and dried use your needle tool to poke into the middle of your roll. Push the small line of paper to one side so that it cannot be seen. Now your roll will have a nice round hole as seen in the right hand photo here.

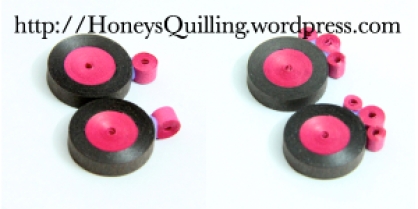
- Roll the two 3” strips as well as the 36” strips. All rolled pieces are seen in the left hand photo below. Now it’s time to glue the small pieces to the larger. The smaller pieces are where you will attach your jumprings to join with the earwires. Use a little more glue than you usually would, as you want this to be a spot with a strong bond.

- There are multiple ways to make the top part of the earrings. The left photo below shows that you can put the top piece on horizontally or vertically. The right hand photo shows that you can add more smaller rolls to each side of the larger roll. This creates a nice design and is also more sturdy than just using one roll on top. The size of the side top rolls are 1 ½” long strips of paper.

- Once the pieces are dry you may use a sealant or topcoat to make them sturdy and water resistant. Click HERE to see a collection of posts and tutorials on how to add sealant to your paper quilled jewelry! If you are looking to purchase some sealant, you can find sealants here in my shop, here on Amazon, here at Scrapbook.com or here at Blue Moon Scrapbooking)
- If you would like to make post earrings, just make the main solid roll and do not make the extra little one (or ones). See the photo below for an example of post earrings and a pendant made with this design:
Here’s another cute variation idea – make two small circles for each earring!
Another idea: make simple circles and glue them to earring posts for simple post earrings!
Looking for more tutorials?
Click HERE to see all the free tutorials here on my blog!
Click HERE to see my combo tutorial with many other more detailed designs along with this simple circle
Click HERE to see the rest of the tutorials I have for sale in my etsy shop.
Click HERE to view tips and tricks for paper quilling, divided into subjects!
Click HERE to find where you can purchase paper quilling supplies – many sources listed from around the globe!
*This post contains some affiliate links. If you make a purchase through the affiliate link I get a small percentage. I only link to products that I use and love. Thank you for supporting my blog!


i like ur tutorial,. nice & smple to understand. expecting more from u